Camping Nachos

Ever been sitting around the campfire, having a beer or glass of wine and get an urge for a snack?  S'mores are great fun but don't go real well with beer (actually they go pretty well with wine, in my opinion. ) On one such night I tried to imagine how some of our favorite snacks could become campfire favorites and the next day I came upon these photos of nachos and knew this would fill the snack void during our next campfire.  Everyone loves nachos and this easy  method is so adaptable that it can accommodate anyone's fancy.  I adapted the recipe by combining several others and the photos are from a pinterest pin that credited The Inspired Dreamer blog (http://inspiredreamer.com)
You can almost make it just from the photos but here are some ingredients and directions.

Ingredients
  • FOR THE GARLIC CREAM SAUCE: or use a jar of prepared Ranch or Alfredo sauce
  • 1-½ Tablespoon Butter
  • ½ Tablespoons Olive Oil
  • 3 cloves Garlic, Minced 
  • ½ cups Heavy Cream(I substitute plain Greek yogurt but it has a little more tart flavor)
  • ¼ cups Milk
  • Salt and pepper
  • 1 pinch Red Pepper Flakes
  • ¼ cups Parmesan Cheese, Grated 
  • FOR THE NACHOS:
  • Tortilla Chips
  • ½ cups Garlic Cream Sauce (above)or use a jar of prepared Ranch or Alfredo sauce
  • ¼ cups Onion, Diced
  • ½ lb cooked hamburger or sausage meat (I brown it in advance and freeze in baggies) As an alternative you could use pepperoni, shredded chicken or a can of beans, rinsed
  • ½ cups Black Olives Sliced
  • ½ Green Bell Pepper, Diced
  • 1 cup favorite shredded cheese
  • Sliced jalapenos 

Melt the butter in a sauce pan. Make a roux by adding the Parmesan cheese to the melted butter and blend.   Add in the cream and milk stirring constantly till blended. Add in remaining sauce ingredients. Simmer on low do not boil.
Layer the chips in a dutch oven (or any pan that can withstand the heat of an oven/campfire,) pour sauce over chips and layer remaining nacho ingredients.
Heat in a 350F oven or place over coals till cheese is melted. If you cook on coals remember to have fireproof mitts or pot holders for dutch oven.

Have some tongs or a flat scoop nearby and dish the nachos onto paper plates. Bet there won't be any leftovers!

Summer Dessert: Sand Pudding

Beating the heat with desserts


Here's an easy summer dessert recipe that the whole family will have fun making.  

Ingredients:
·        1 pkg. vanilla wafers
·        2 Oreos
·        8oz cream cheese
·        ¼ cup butter
·        2/3 cup powdered sugar
·        2 small pkgs. French vanilla pudding mix
·        2 ¾ cup milk
·        12 oz. cool whip 

Directions:
Add vanilla wafers and 2 Oreo cookies to your food processor and crush until they resemble sand. In a small bowl cream together softened 8oz cream cheese, butter, and powdered sugar. In another larger bowl, mix pudding with milk. Add pudding mixture to the cream cheese mixture. Fold in the cool whip. Layer into bucket in this order: sand, pudding, sand, pudding, etc.

A "No Bake" "No Brainer" Summer Cake

Searching for a summer dessert recipe for our June Great Backyard Month gathering at Hidden Valley RV Park, I found countless ideas online but all seemed too heavy for a hot day.  I found a few great ideas though.  My favorite type of recipe for any season is a "no bake." I have become an aficionado of "no bake" foods and desserts for a few reasons.

  • With many foods you retain more nutrients if they are in their natural, whole state.  
  • They also tend to be less calorie stuffed.  Just looking at a rich dessert adds to my belly.
  • You don't find many occasions where flour is used in a "no bake" recipe (I'm trying to use less flour)
  • Saves preparation time (I'm the quick order type cook) 
  • Texas is just too hot to be turning on the oven in the summer (yeah, sometimes triple digits.)

I found one recipe with two variations, one more healthy than the other, that topped the list in all of the above points.  TaaDaa!  Watermelon Cake.  And here it is with directions and ingredients:


Fresh Watermelon Cake
That's right, all the ingredients and directions in one photo.  Now that's my definition of easy.
Note: I prefer using seedless watermelon if available.

The 'icing' on the cake is where the variation is available.  Quick and easiest is using cool whip.  It's texture is plenty thick and it stands up well to a little bit of heat while serving the cake. Note: not a whole food and not very healthy. You may also use freshly whipped heavy cream.  Here's a couple hints to make the whipped cream stiffer so it will work better to spread on a cake:

Putting the mixer bowl and whisk attachment in the refrigerator to get it cold is helpful. I use 1 cup of heavy cream cold from the frig, 2 Tbsp of powdered or granulated sugar and, if desired, a half tsp of  vanilla, almond or coconut extract Add all the ingredients in a mixer.  Then whip first on low, then on high until you have peaks.
Keep checking the stiffness of your whipped cream because you can get it to different levels. Voila! That’s it!

Note: Stop at soft peeks if you are using it for just a topping of a dessert. Make it a stiffer if you are going to use it on a cake.  You may double the first two ingredients if you need a big batch.

But I found a recipe for an even healthier but a bit more time consuming, unless you do part of the recipe in advance.  Instead of the whipped cream, I often use this healthy alternative, coconut whipped cream.  You can make this up to a week in advance so that when you put the cake together the prep time is very minimal.

Healthy alternative to Whipped cream

Use your imagination for substitutions on the cream toppings and side decor.  Granola can be used instead of almonds or you can use pieces of cantaloupe, honeydew melon or pineapple slices, cut into stars or other shapes with tiny candy cutters and held in place by toothpicks. 

The cake does well in the refrigerator over night if you want to prepare it the day before but in that case, put a piece of paper towel under the melon to soak up any liquid that comes out of the melon overnight.

Do you have any cool and easy summer recipes to share?  Drop in some ideas in the comments below.


Teri welcomes you to Hidden Valley RV Park
Teri Blaschke is the RV Park operator of family owned HiddenValley RV Park in San Antonio, TX and writer of the park blog “A Little Piece of Country in San Antonio.” Teri contributes to various other blogs with a focus on either travel or social media and how it relates to the outdoor hospitality industry but her passion is serving the RV travel community by providing a memorable RV camping experience and growing the Hidden Valley RV family.  Connect with us on Google+, Facebook, Pinterest and Twitter@HiddenValleyRV

Cowboy Caviar, A San Antonio Favorite

Oh caviar!  The savory snack of the rich and famous.  I wouldn't have thought there was any food from the sea that I didn't like but I can do without caviar.  Little black, salty fish eggs, you either love it or hate it.

So when I heard about a neighbor's BBQ where Cowboy Caviar was to be one of the dishes, I assumed
that would be one dish I steer away from.  But once there, I saw the dish of color and beauty that you see here and was pleasantly surprised by the Mexican spices and fresh bounty of vegies in season. 

If you like the basic recipe, make sure to experiment with substituting other types of beans, adding salad sized shrimp, prepared pasta, serving as a side dish with meats or its traditional use, served with big tortilla chips for scooping.  Remember, you can also leave out a spice or vegie you don't like or have on hand.

 Ingredients:

2 c corn or 1 can
1/2 onion, chopped
1 c green or other color bell pepper, chopped
1 bunch green onions, chopped

1 c diced celery
2 jalapeno peppers, chopped (optional)
1 tablespoon minced garlic
1 pint cherry tomatoes, quartered
1 (8 ounce) bottle zesty Italian dressing (or 1/2 c oil and 1/4 c red wine vinegar plus salt and pepper & 1/4 c sugar)
1 (15 ounce) can black beans, drained and rinsed

1 (15 ounce can black eyed peas, drained and rinsed
1/2 teaspoon ground coriander (seeds from cilantro plant, ground)

1/4 teaspoon cumin or to taste (optional, not in the original recipe but it makes a nice addition) 
1 bunch chopped fresh cilantro or to taste


Instructions:

Chop the vegies rather small so they are consistent with size of the corn kernels.  In a large dish, mix everything together except the cilantro . I like to use a 9 X 13 dish because more of the vegies get more of the marinade. Cover and chill in the refrigerator 4 hours or more. I like to drain off the dressing and return a couple teaspoons just to keep it moist.  This cuts down on the calories from the oil in the dressing.  Toss with desired amount of fresh cilantro to serve.


Makes about 10 cups


Teri Blaschke is the RV Park operator of family owned HiddenValley RV Park in San Antonio, TX and writer of the park blog “A Little Piece of Country in San Antonio.” Teri contributes to various other blogs with a focus on either travel or social media and how it relates to the outdoor hospitality industry but her passion is serving the RV travel community by providing a memorable RV camping experience and growing the Hidden Valley RV family.  Connect with , Facebook, Pinterest and Twitter@HiddenValleyRV and our RV Country Daily Magazine and don't forget to Say hello to the voice of Hidden Valley 

Bermuda Boys Loquat Liquor


During the winter of 2011 we had a visit from Ron and Sally Boys traveling in their 5er from FL.  They called themselves the Bermuda Boys because they lived in Bermuda for a time.  Because our yard had a soon to bloom loquat tree we got to talking about a recipe they concocted for Loquat Liquor. 

First, what's a loquat?  This unusual fruit grows in semi-tropical climates and has evergreen foliage in most places.  For years I would just use this fruit by plucking it straight from the tree, biting off a piece, sucking out the seeds, spitting them out, then savoring the remaining sweet, tangy flavor of the inner flesh.  If eaten early during the season the skins are tender and easily palatable but late in the season the skins tend to be a bit more tough so many prefer to just suck out the flesh and discard the skins. To me the fruit is similar to an apricot.


The seeds, like several other fruit seeds, have a small amount of arsenic in them but they are used by many to make liquors that are reputed to taste like amaretto, an almond based drink.  I've not seen these fruits in stores anywhere I've lived but understand they can be found in specialty stores or in places where they grow plentifully.

Our April harvest was a bumper crop just waiting to be tried in the liquor.

So without further ado, here is the famous Bermuda Boys Loquat Liquor Recipe (they told me I could share):

  • Glass Bottle (I used a gallon pickle jar) 
  • equal parts of Vodka and sugar (rock sugar is best but I just used regular sugar)
  • washed loquats with the seeds in

That's it.  Make sure that the vodka sugar mixture covers the fruit.  Let this mixture sit, covered and in the dark for 6 months.  Take off the liquid and bottle.

There was one last instruction from Sally.  "Sit down before you sample this."  She also suggested dipping the "pickled" loquats in chocolate for a special treat.

I put mine up in early April and will be "uncorking" the jar in October and will follow with an update.

UPDATE:  OM Goodness.  This liquor has no taste what so ever of a heady liquor but only the sweetness of it's fruit base and a bit of an after result, a euphoric lightness of mood.  If you stop by the registration house,  I'll be glad to share.

Teri Blaschke is the RV Park operator of family owned HiddenValley RV Park in San Antonio, TX and writer of the park blog “A Little Piece of Country in San Antonio.” Teri contributes to various other blogs with a focus on either travel or social media and how it relates to the outdoor hospitality industry but her passion is serving the RV travel community by providing a memorable RV camping experience and growing the Hidden Valley RV family.  Connect with , Facebook, Pinterest and Twitter@HiddenValleyRV and our RV Country Daily Magazine and don't forget to Say hello to the voice of Hidden Valley 

What's So Good about a Pineapple?

 
If you're like me, you're always thinking of more ways to include fruit in your daily diet.  I like fruit but it so often gets over ripe in my refrigerator before I get around to eating it.  I just don't get in the fruit mood.  There are 2 exceptions to this.  One is watermelon, (think I could eat a whole one in one sitting) and the other is the

theRVGourmet, What's so Good About Pineapple-Plant
subject of today's post,  the simple pineapple.  Actually there are several reasons that the pineapple is unique and NOT so simple.

It probably initiated from Brazil and Paraguay and eventually made it's way to the Caribbean where Columbus "discovered" it and brought in back to Europe.  
theRVGourmet, What's so Good About Pineapple-Bromeliad

It's a member of the bromeliad family and only produces one fruit in it's lifetime.  It is extremely rare that bromeliads produce edible fruit. The pineapple is the only available edible bromeliad today.

It is a multiple fruit. One pineapple is actually made up of dozens of individual flowerettes that grow together to form the entire fruit. Each scale on a pineapple is evidence of a separate flower.

theRVGourmet, What's so Good About Pineapple-Flowers


According to my research pineapples stop ripening the minute they are picked and no special way of storing them will help ripen them further.  It seems to me that as they sit on the counter they tend to get sweeter but all I've read says this is not true,  How can you pick a ripe one?  Color is relatively unimportant in determining ripeness.
Choose your pineapple by smell.  If it smells fresh, tropical and sweet, it will be a good fruit.

The more scales on the pineapple, the sweeter and juicier the taste.

After you cut off the top (or better yet twist it off), you can plant it.
It should grow much like a sweet potato will.  According to the website BUZZLE this is the best procedure:


theRVGourmet, What's so Good About Pineapple-how to grow
Courtesy of  Buzzle: http://www.buzzle.com/articles/growing-pineapple-plants-how-do-pineapples-grow.html


Choosing a Pineapple: The pineapple that you have chosen for growing at home need to be brownish in color; leaves must be green. Avoid using pineapples that have yellowish leaves.
Preparing the Crown for Rooting: The pineapple plant is commonly cultivated from the crown. It is advisable to pull off the crown from the fruit by twisting it; this way, the crown comes out clean without any flesh adhering to the base. Removing the lower leaves reveals the base of the crown. You may find a few short roots at the base.
Rooting: The process of rooting requires the crown to be kept immersed in water for about 3 weeks. You will have to replace the water in the container regularly.
Planting: The process of planting the pineapple crowns begins with selecting a proper soil medium for its growth. Also, the layers in which these media are arranged holds great importance. For example, the bottom layer is formed of pebbles which allow proper drainage of water. Above this layer, you should spread soil that is mixed with a medium like perlite. Crown should be planted in this layer of soil and then the soil watered. It takes about 6 weeks for the roots to gain hold in the soil. By the end of 2 months, the pineapple plant gets firmly rooted in the soil.

This delicious fruit is not only sweet and tropical; it also offers many benefits to our health. Pineapple is a remarkable fruit. 

  • It is valuable for easing indigestion, arthritis or sinusitis.
  • The juice has an anthelmintic effect; it helps get rid of intestinal worms. 
  • Pineapple is high in manganese, a mineral that is critical to development of strong bones and connective tissue. A cup of fresh pineapple will give you nearly 75% of the recommended daily amount. It is particularly helpful to older adults, whose bones tend to become brittle with age.
  • Bromelain, a proteolytic enzyme, is the key to pineapple's value. Proteolytic means "breaks down protein", which is why pineapple is known to be a digestive aid. It helps the body digest proteins more efficiently. 
  •  Bromelain is also considered an effective anti-inflammatory.Regular ingestion of at least one half cup of fresh pineapple daily is purported to relieve painful joints common to osteoarthritis. It also produces mild pain relief.
  • Fresh pineapple is high in Vitamin C and because of the Bromelain, it has the ability to reduce mucous in the throat.  It is commonly used in Europe as a post-operative measure to cut mucous after certain sinus and throat operations.
  •  Pineapple is also known to discourage blood clot development. This makes it a valuable dietary addition for frequent fliers and others who may be at risk for blood clots.
  • An old folk remedy for morning sickness is fresh pineapple juice. My daughter-in-law said it really works! Fresh juice and some nuts first thing in the morning often make a difference.
  • It's also good for a healthier mouth. The fresh juice discourages plaque growth.
So, no matter how you cut it up, juice it or add it to salads and other cold dishes, fresh pineapple is a miracle fruit.  No wonder we like it so much. 

Let's put together some favorite recipes with ineapple to celebrate this tropical delight.  You can add your favorites in the comments or send them for future publication to info@HiddenValleyRV.net.


Teri Blaschke is the RV Park operator of family owned HiddenValley RV Park in San Antonio, TX and writer of the park blog “A Little Piece of Country in San Antonio.” Teri contributes to various other blogs with a focus on either travel or social media and how it relates to the outdoor hospitality industry but her passion is serving the RV travel community by providing a memorable RV camping experience and growing the Hidden Valley RV family.  Connect with , Facebook, Pinterest and Twitter@HiddenValleyRV and our RV Country Daily Magazine and don't forget to Say hello to the voice of Hidden Valley 


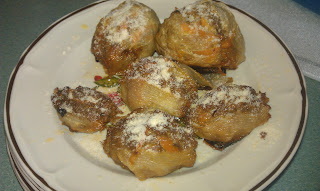
Onion Bombs

Summer time is finally here and that means camping and grilling outdoors.  Compact and easy meals are always our favorite so we have more time to spend together.  We've prepared these at home and frozen them, then packed them in the RV.  Put in the refrigerator on the morning you want to serve them and pop onto the coals about 30 minutes before you want to eat.  It's also a fun activity with young ones.  Line them up at the picnic table and set them to packin' the onions.
 

Ingredients:
large onions
ground meat (any variety - beef, turkey, venison, pork or a mixture)

seasonings to taste ( meatloaf style, taco type seasonings, italian seasonings)
grated cheese (or a little slice for each bomb) of your choice
tin foil

Onion bombs before cooking
Directions:
1. Peel your onions and cut them in half. If the onion is large it's sometimes possible to cut down only one side of the onion and have full circles to stuff.  Lay a slice of cheese in the onion cup or add some grated cheese to the ground meat.
2. Prepare your meatballs how you want them
3. Size your meatballs so that they can be squished between two pieces of onions. Some meat will push out the ends and that is okay.   Just make them as compact as possible.
4. Wrap each onion bomb in tinfoil-- either double them or use heavy duty foil since they'll be tossed in the fire.  Use tongs not a fork so you don't poke holes in the foil.
5. Toss in the fire and try to get them in the coals.
6. Cook for about 10 minutes, flip "em around and cook another 10 minutes or so.

Onion Bombs, theRVGourmet.blogspot.com

I've also made these in the oven on 375 degrees for about 30 minutes.  They make the whole house smell delicious.  Set atop a layer of tomato sauce they have a nice presentation. 
Related Posts Plugin for WordPress, Blogger...